Getting Started
Using lsfg-vk may seem daunting at first, so this guide will help you get started with lsfg-vk.
Follow the installation guide here to install lsfg-vk, then return to this page.
Validating the installation
Before we start, you should ideally check if lsfg-vk is installed correctly. To do this, you can run either vkcube or vkcubepp from Vulkan-Tools (if you have it installed):
$ vkcube
Selected WSI platform: wayland
(lsfg-vk) [INFO]: Using profile with name '4x FG / 85% [Performance]' (identified via executable)
(lsfg-vk) [INFO]:   Multiplier: 4
(lsfg-vk) [INFO]:   Flow scale: 0.85
(lsfg-vk) [INFO]:   Performance mode: true
...
If everything is working correctly, you will see messages in the terminal indicating that lsfg-vk is active and the cube will spin slower than usual (for comparison, you can try DISABLE_LSFGVK=1 vkcube).
If this doesn’t work, revisit the installation guide and check out the troubleshooting page.
Next you should run lsfg-vk-cli (or ~/.local/bin/lsfg-vk-cli) to validate your installation:
$ lsfg-vk-cli validateShould any files from older lsfg-vk v1 installations be leftover, you should get a warning about them. Should any files be missing you will also get a warning. Else the configuration will just be printed to the console.
Creating a profile
Open up the lsfg-vk user interface through your application launcher or by running lsfg-vk-ui (or ~/.local/bin/lsfg-vk-ui) in a terminal.
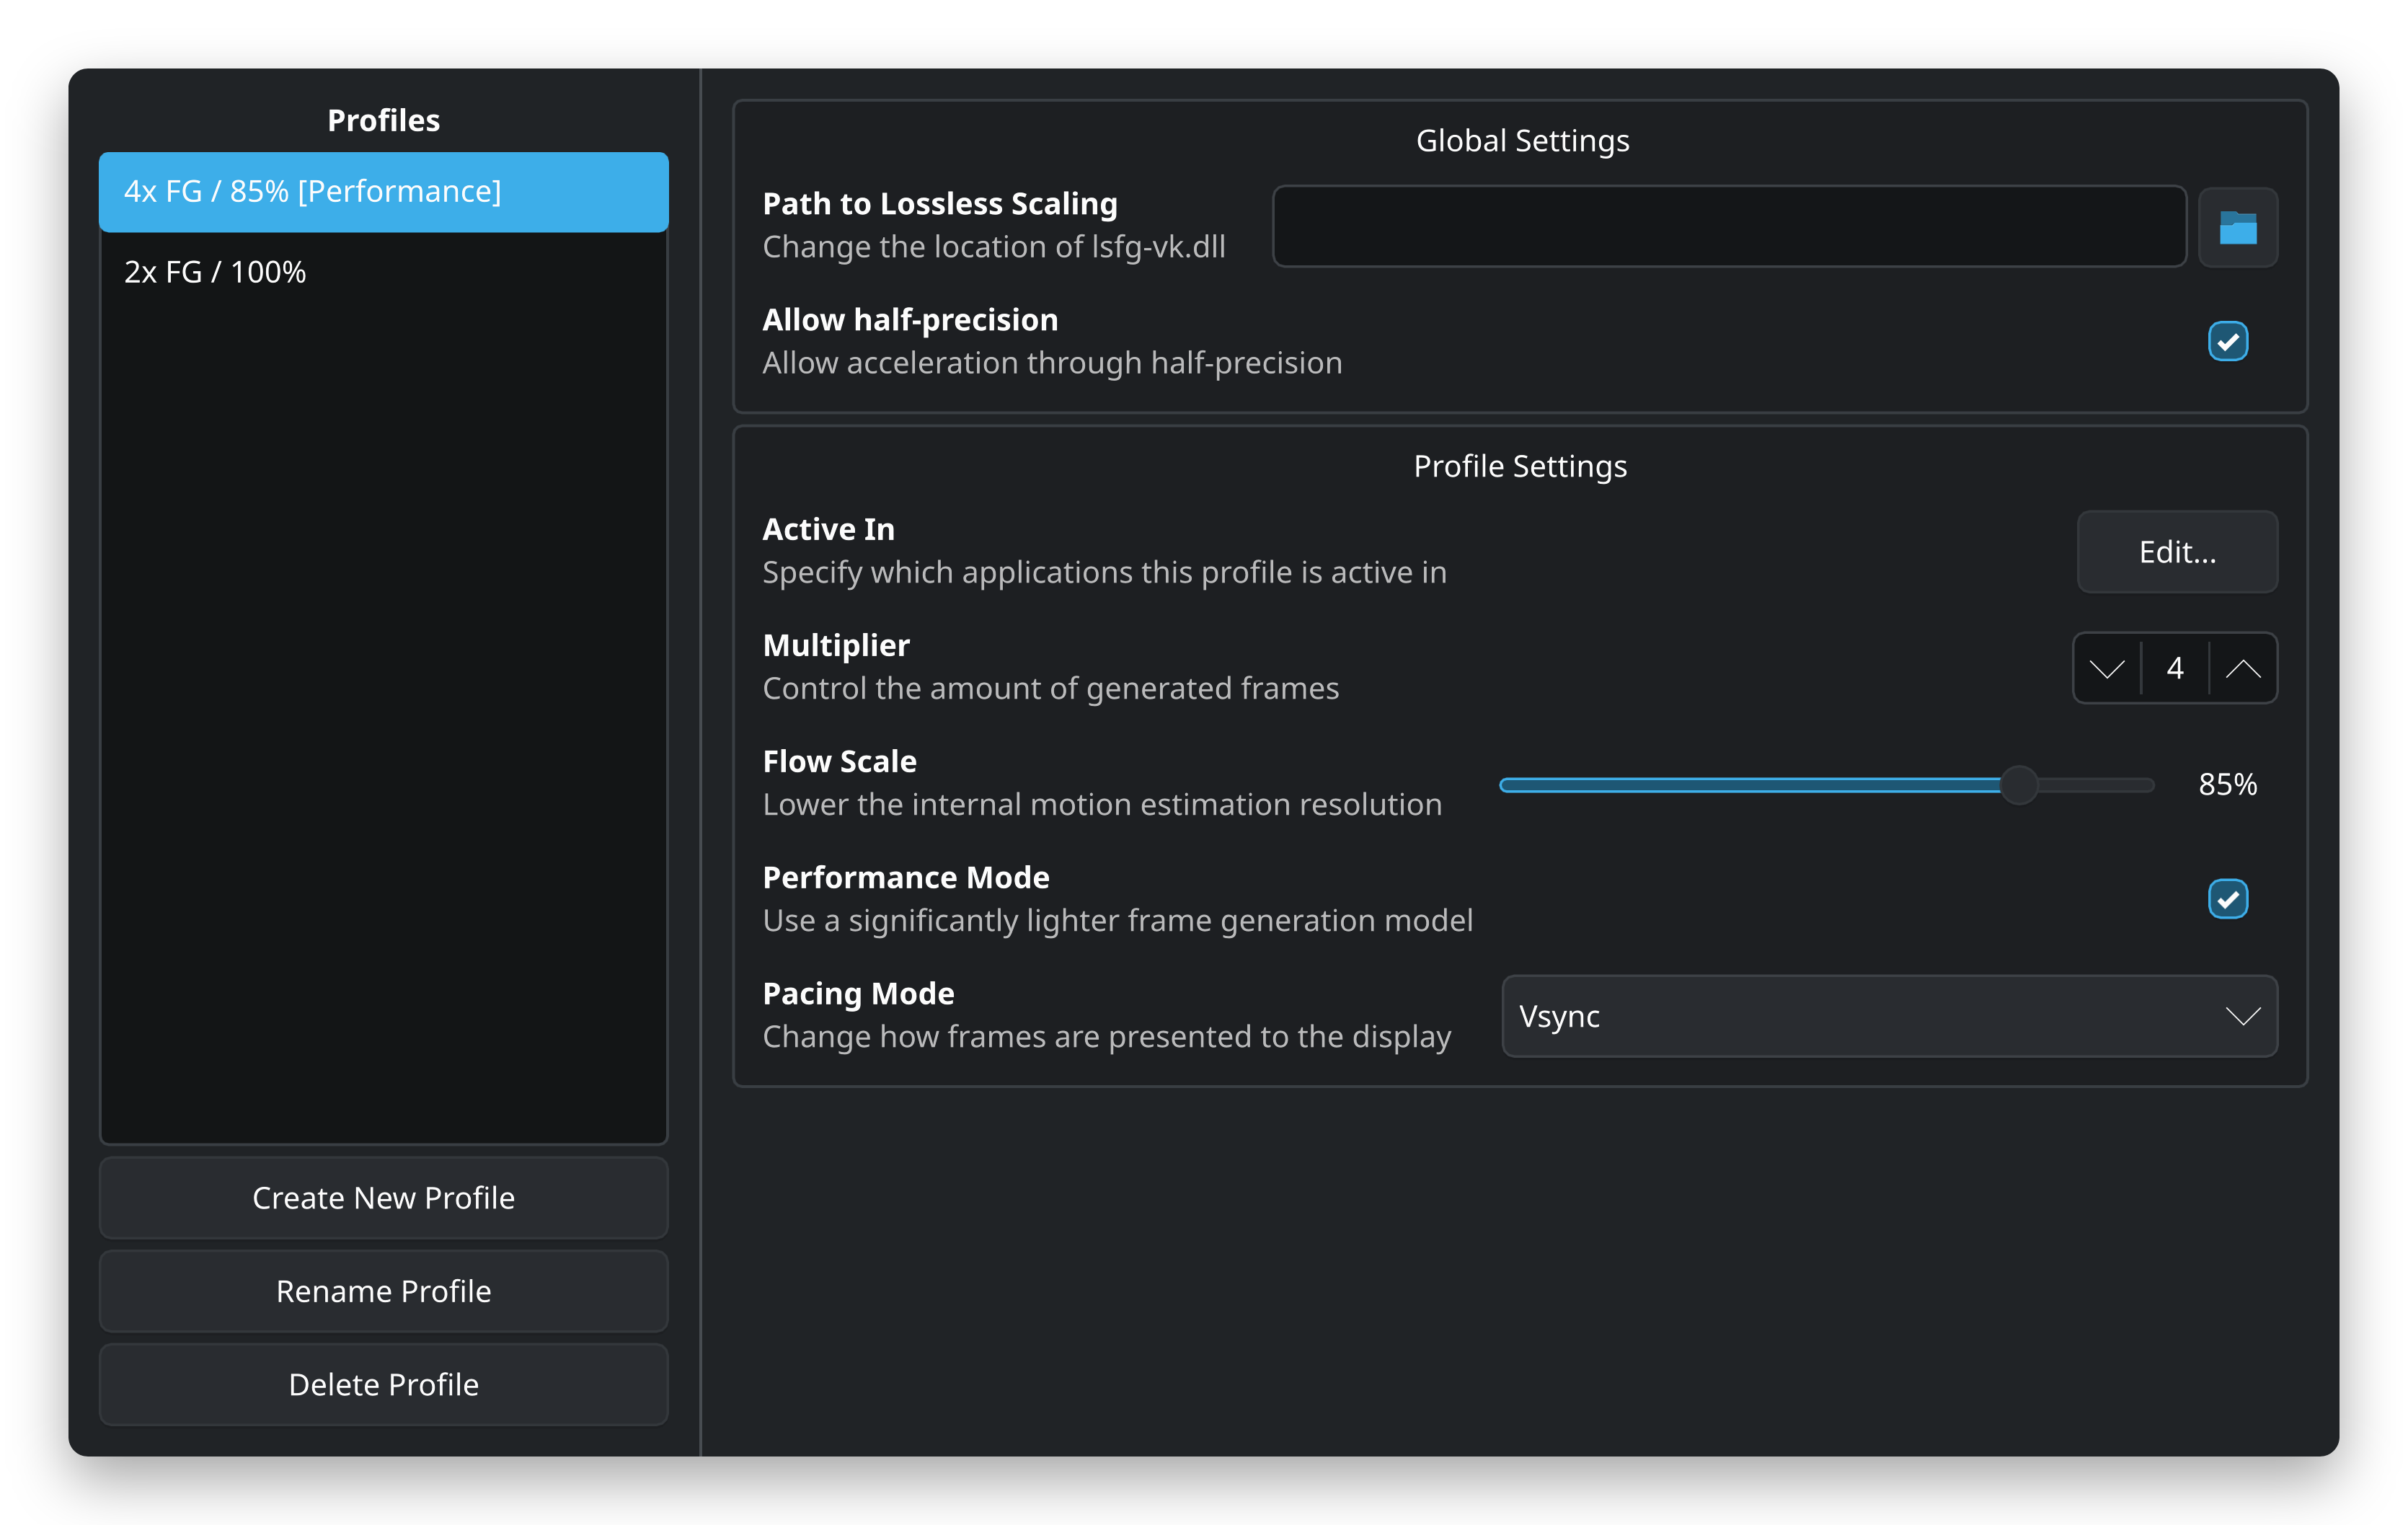
^ On the left side, you can see a list of profiles. On the right side, you can see the properties of the selected profile, as well as a few global settings which are applied to all profiles.
^ Please note that your UI might look a little different. It has been updated since this screenshot was taken, but the functionality is the same.
Click the “Create New Profile” button to create a new profile. Give it a name and click “OK”.
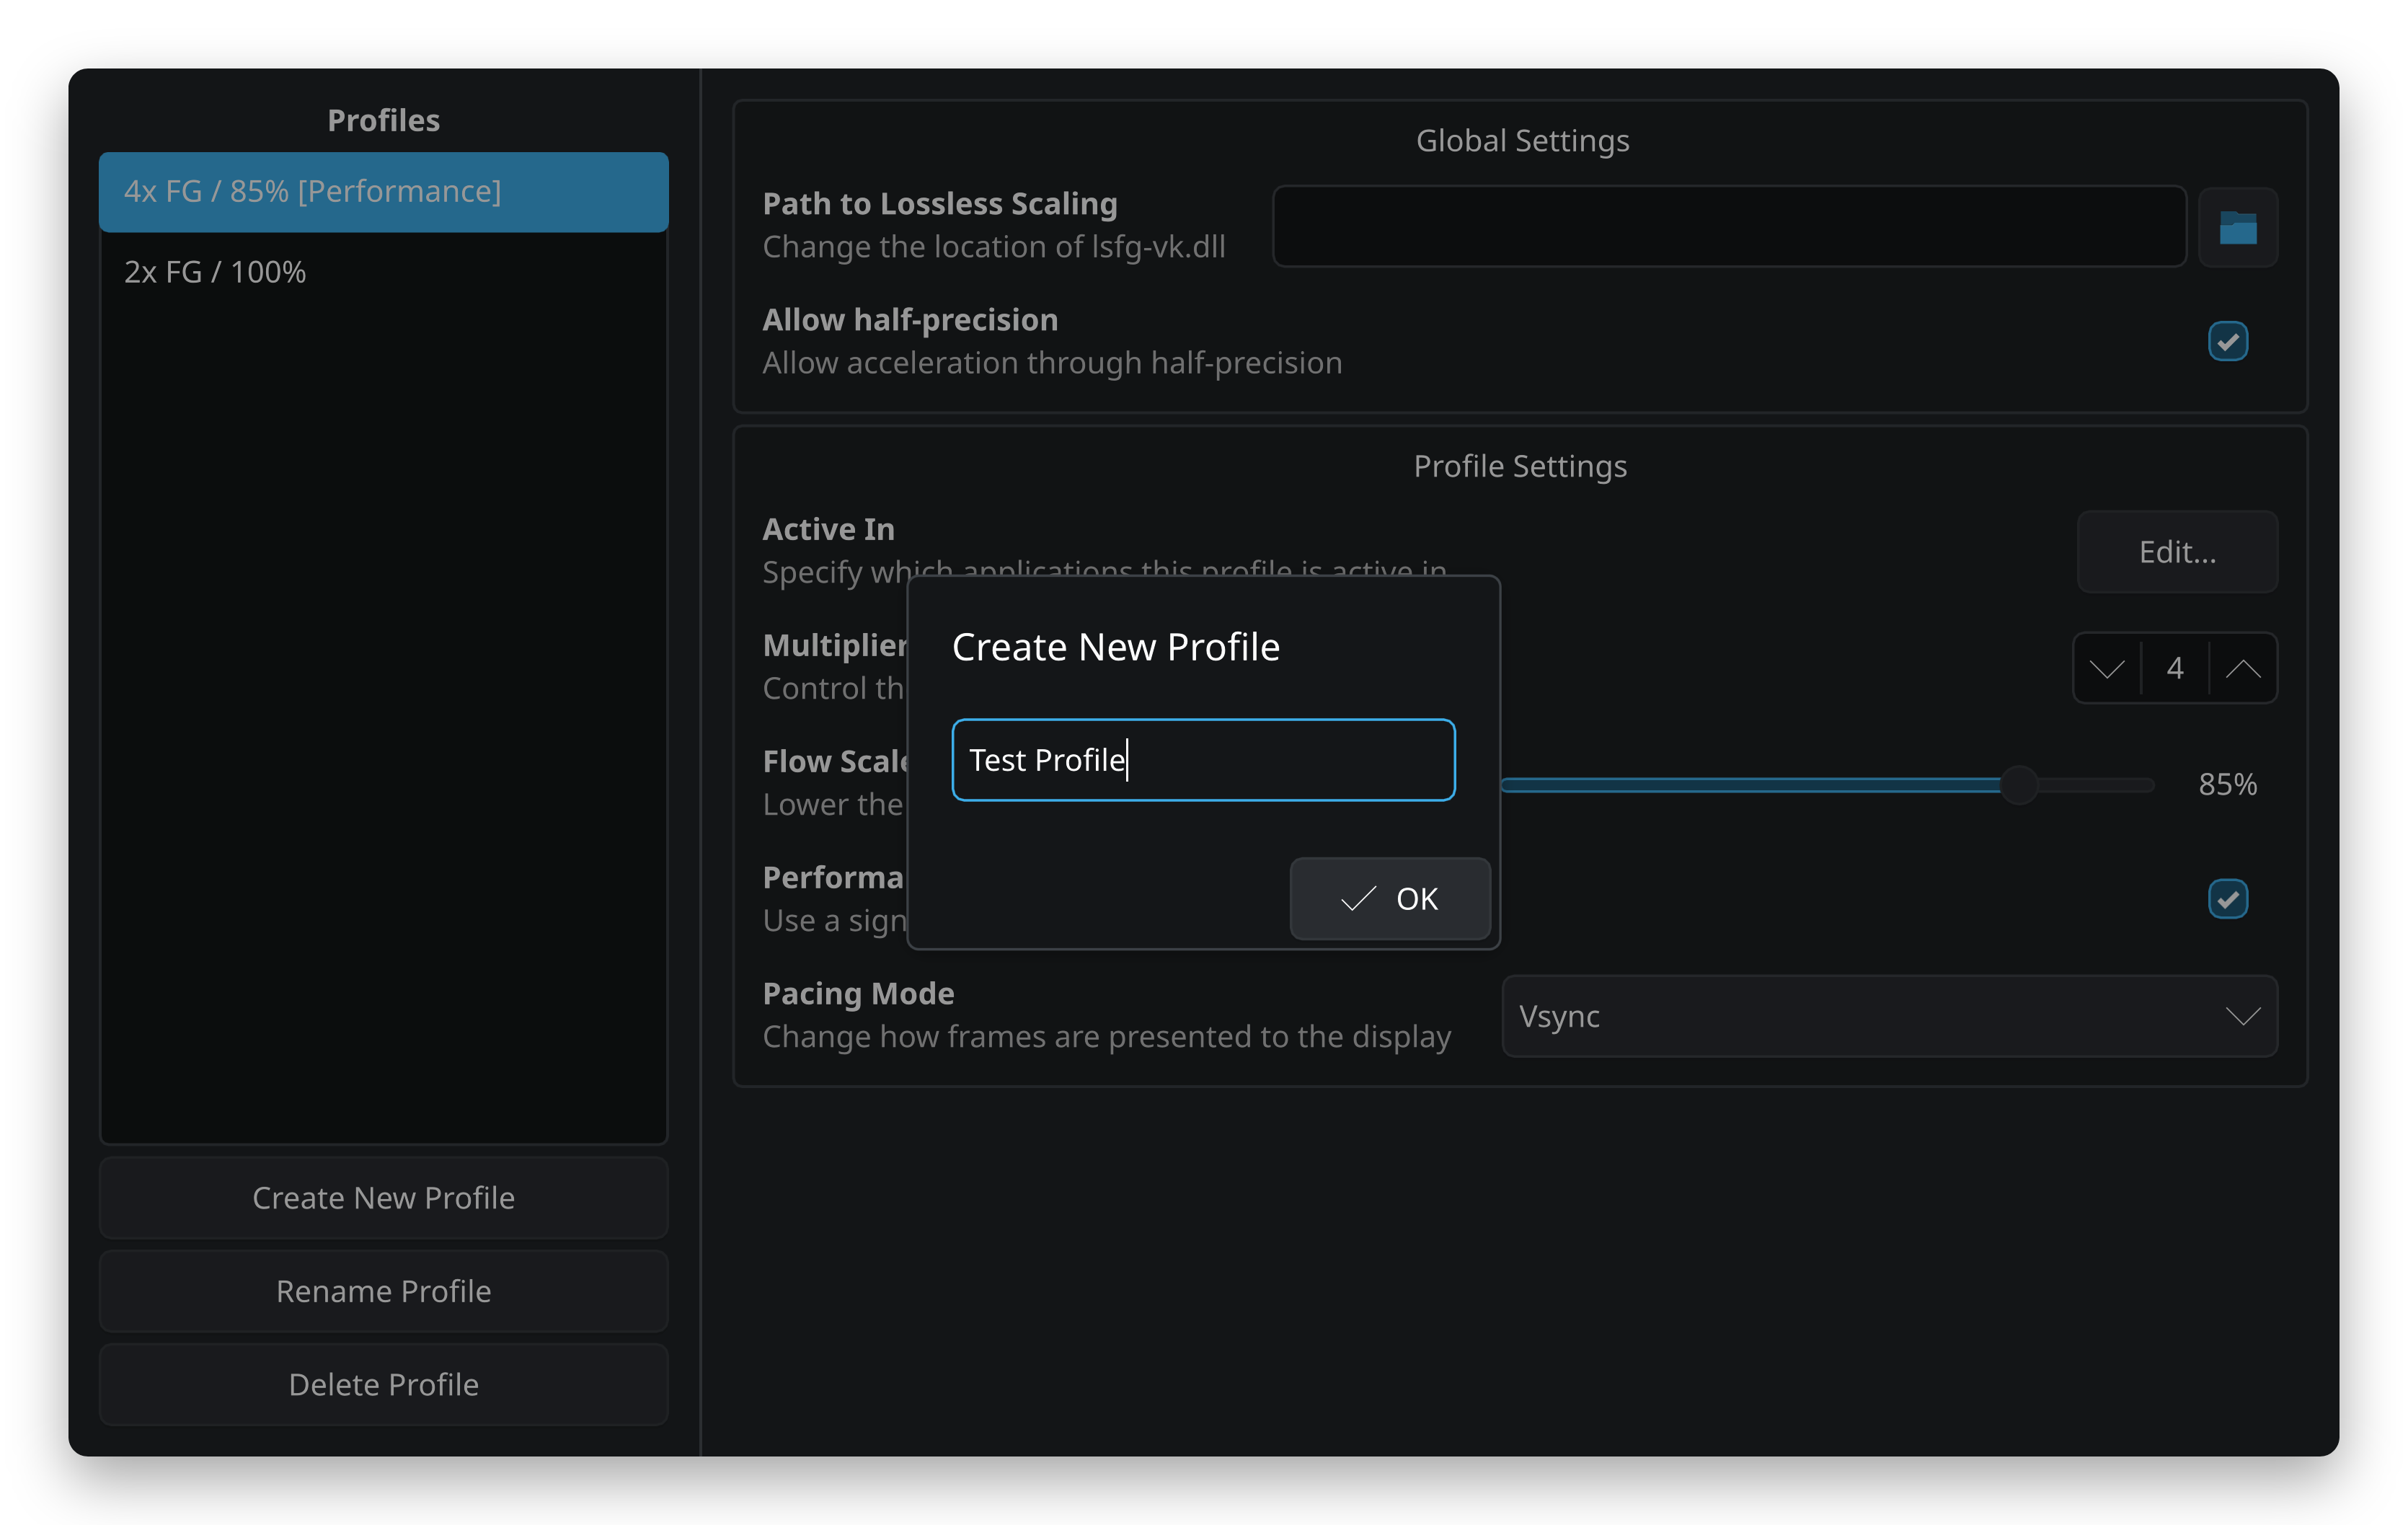
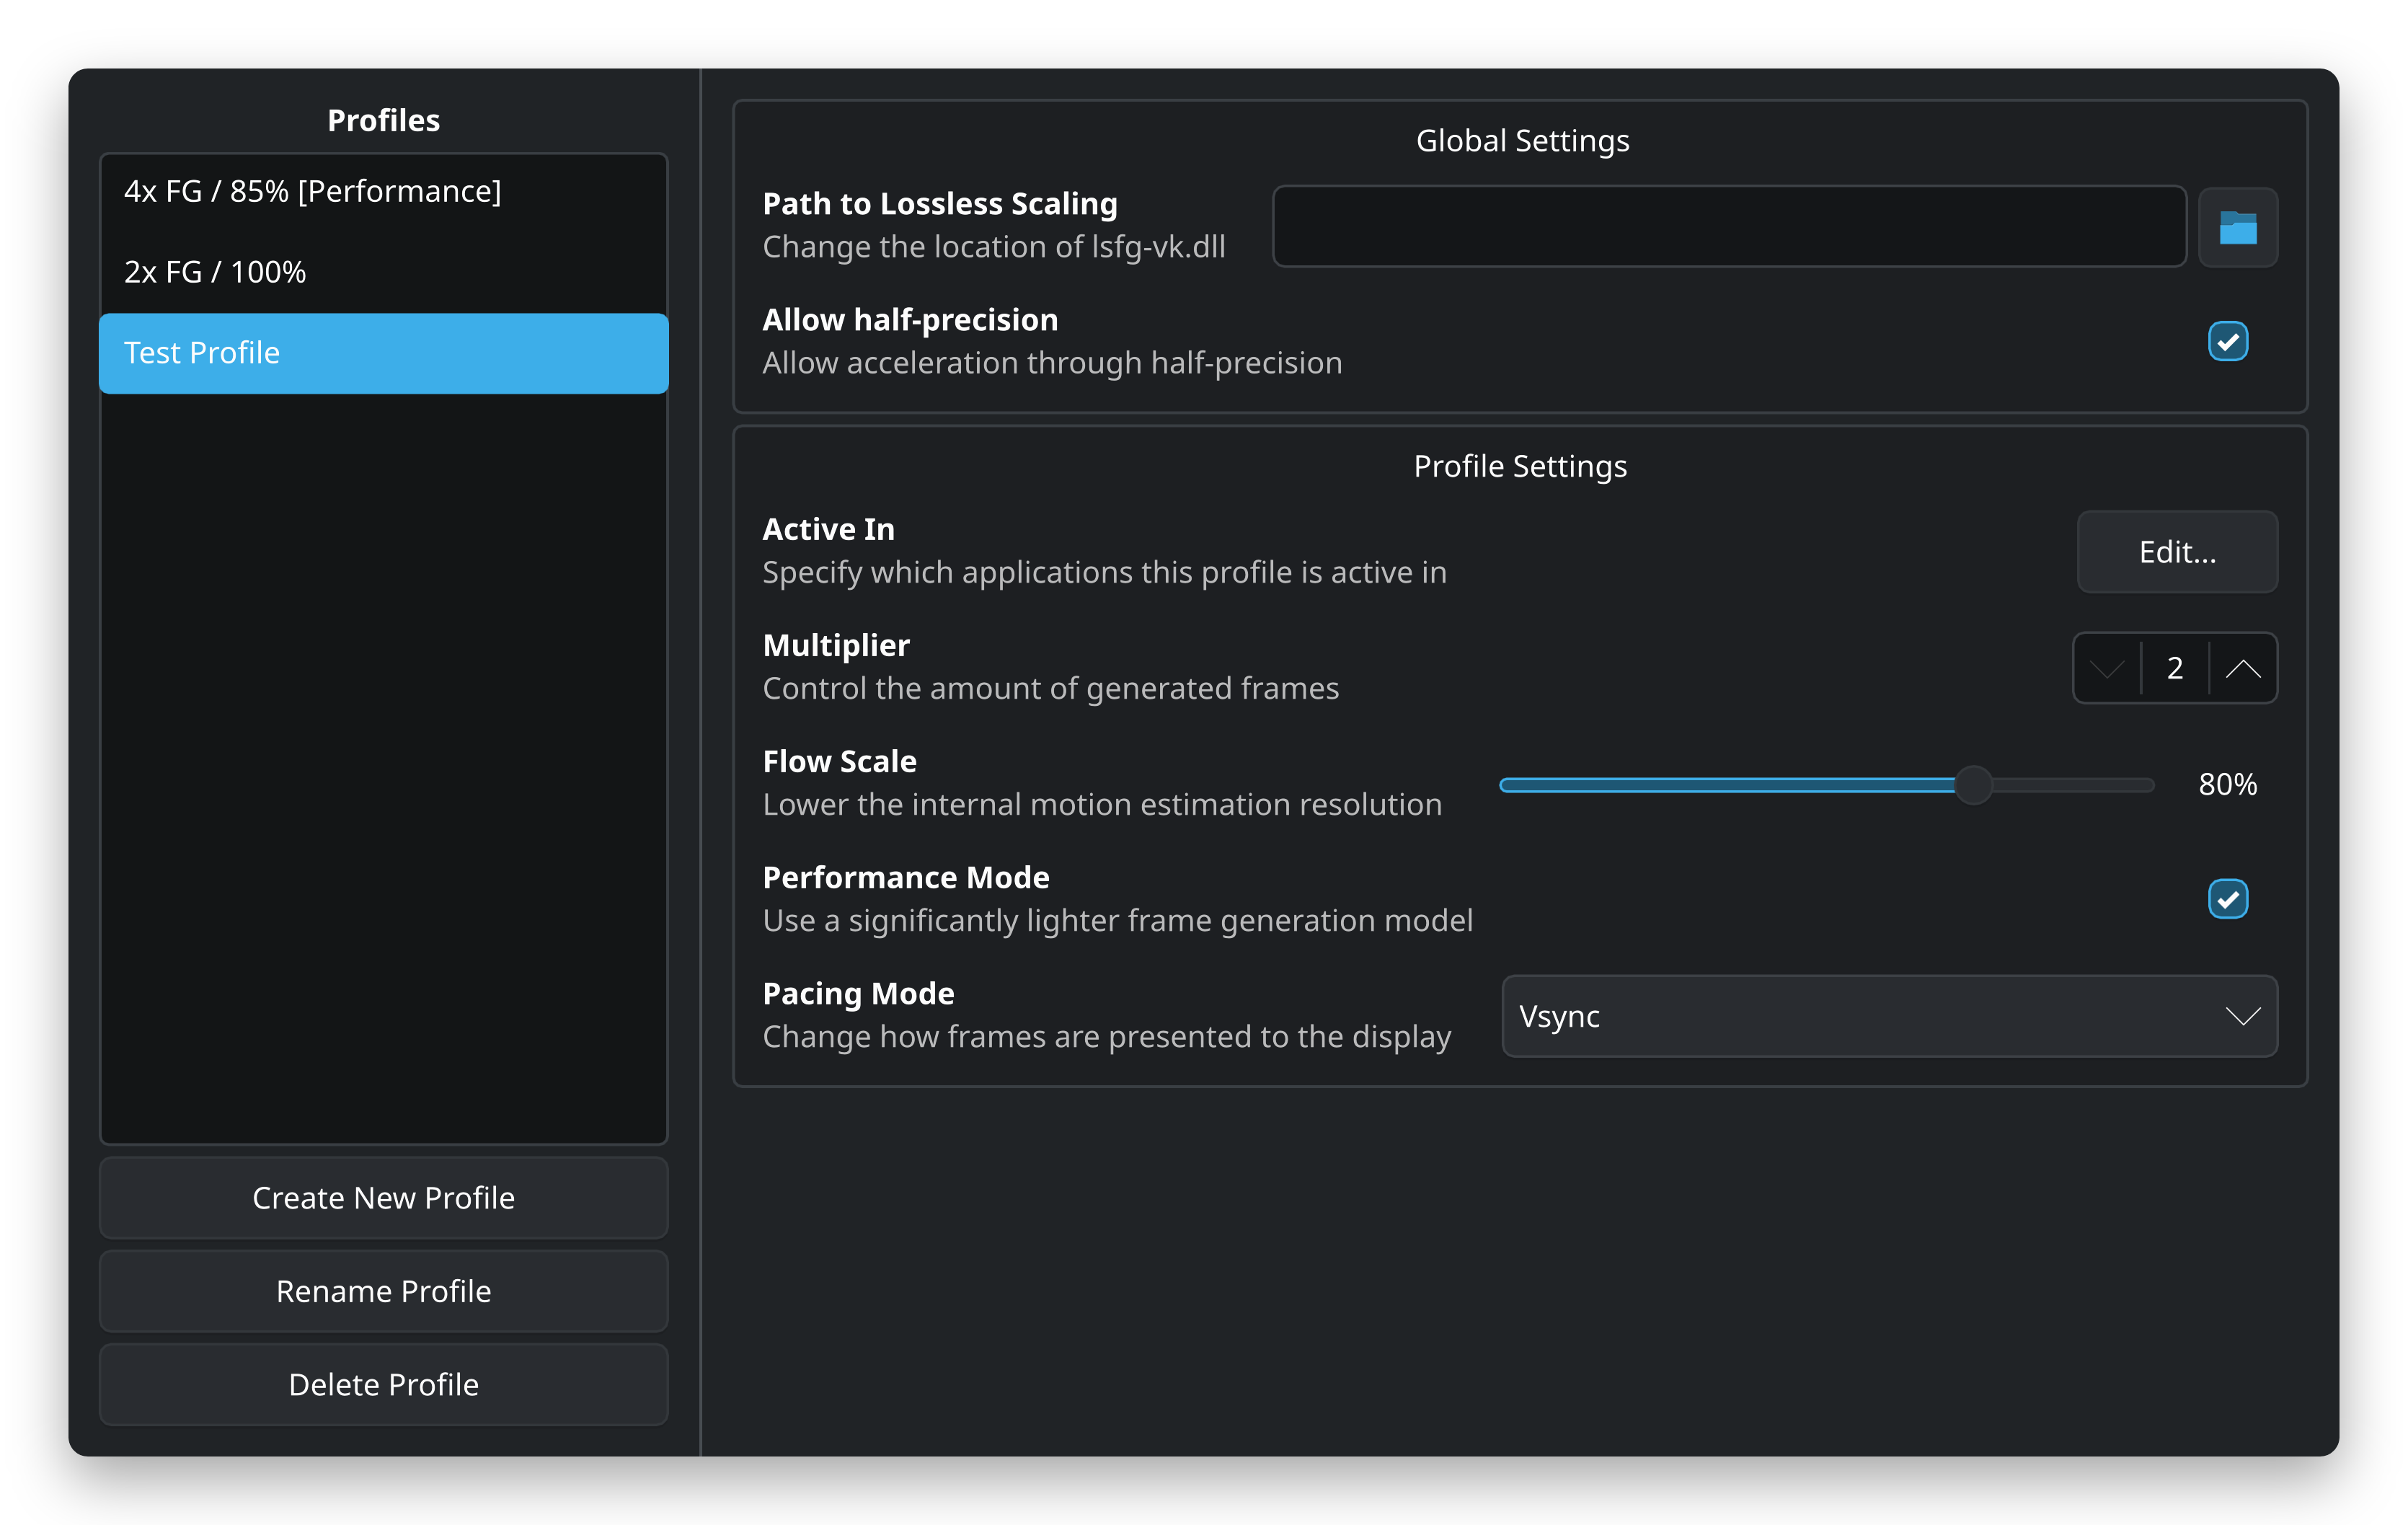
The profile should automatically be selected, and you can now edit its properties. Change the multiplier, flow scale and performance mode as you would on Windows.
When it comes to choosing a “Pacing Mode”, the only option at the moment is “Vsync”. This option requires that you enable Vsync in the game settings, otherwise frames will be duplicated and you might not get any frame generation. This is documented in greater detail on this page.
Enabling the profile for a game
With the profile created, you now have multiple options to enable it for a game.
- If the game is started from a terminal, you can use the
LSFGVK_PROFILEenvironment variable to specify the name of the profile to use (e.g.LSFGVK_PROFILE='Test Profile' %command%). - Otherwise, you can configure the “Active In” property of the profile to automatically enable it when the game is started.
The latter option is most convenient and recommended, so let’s go through the steps to configure it.
To do this, we need to find the executable of the game. There are a number of ways to do this, but the easiest is to browse the game files and find the .exe file. Make sure you don’t pick the wrong executable, as some games (especially UE4/5) have multiple.
For example:
$ find -type f -name '*.exe'
./VotV/Binaries/Win64/VotV-Win64-Shipping.exe # <-- This one!
./VotV.exe
Head back to the lsfg-vk user interface and click the “Edit” button next to the “Active In” property. Enter the executable name (e.g., “VotV-Win64-Shipping.exe”) and click the add button.
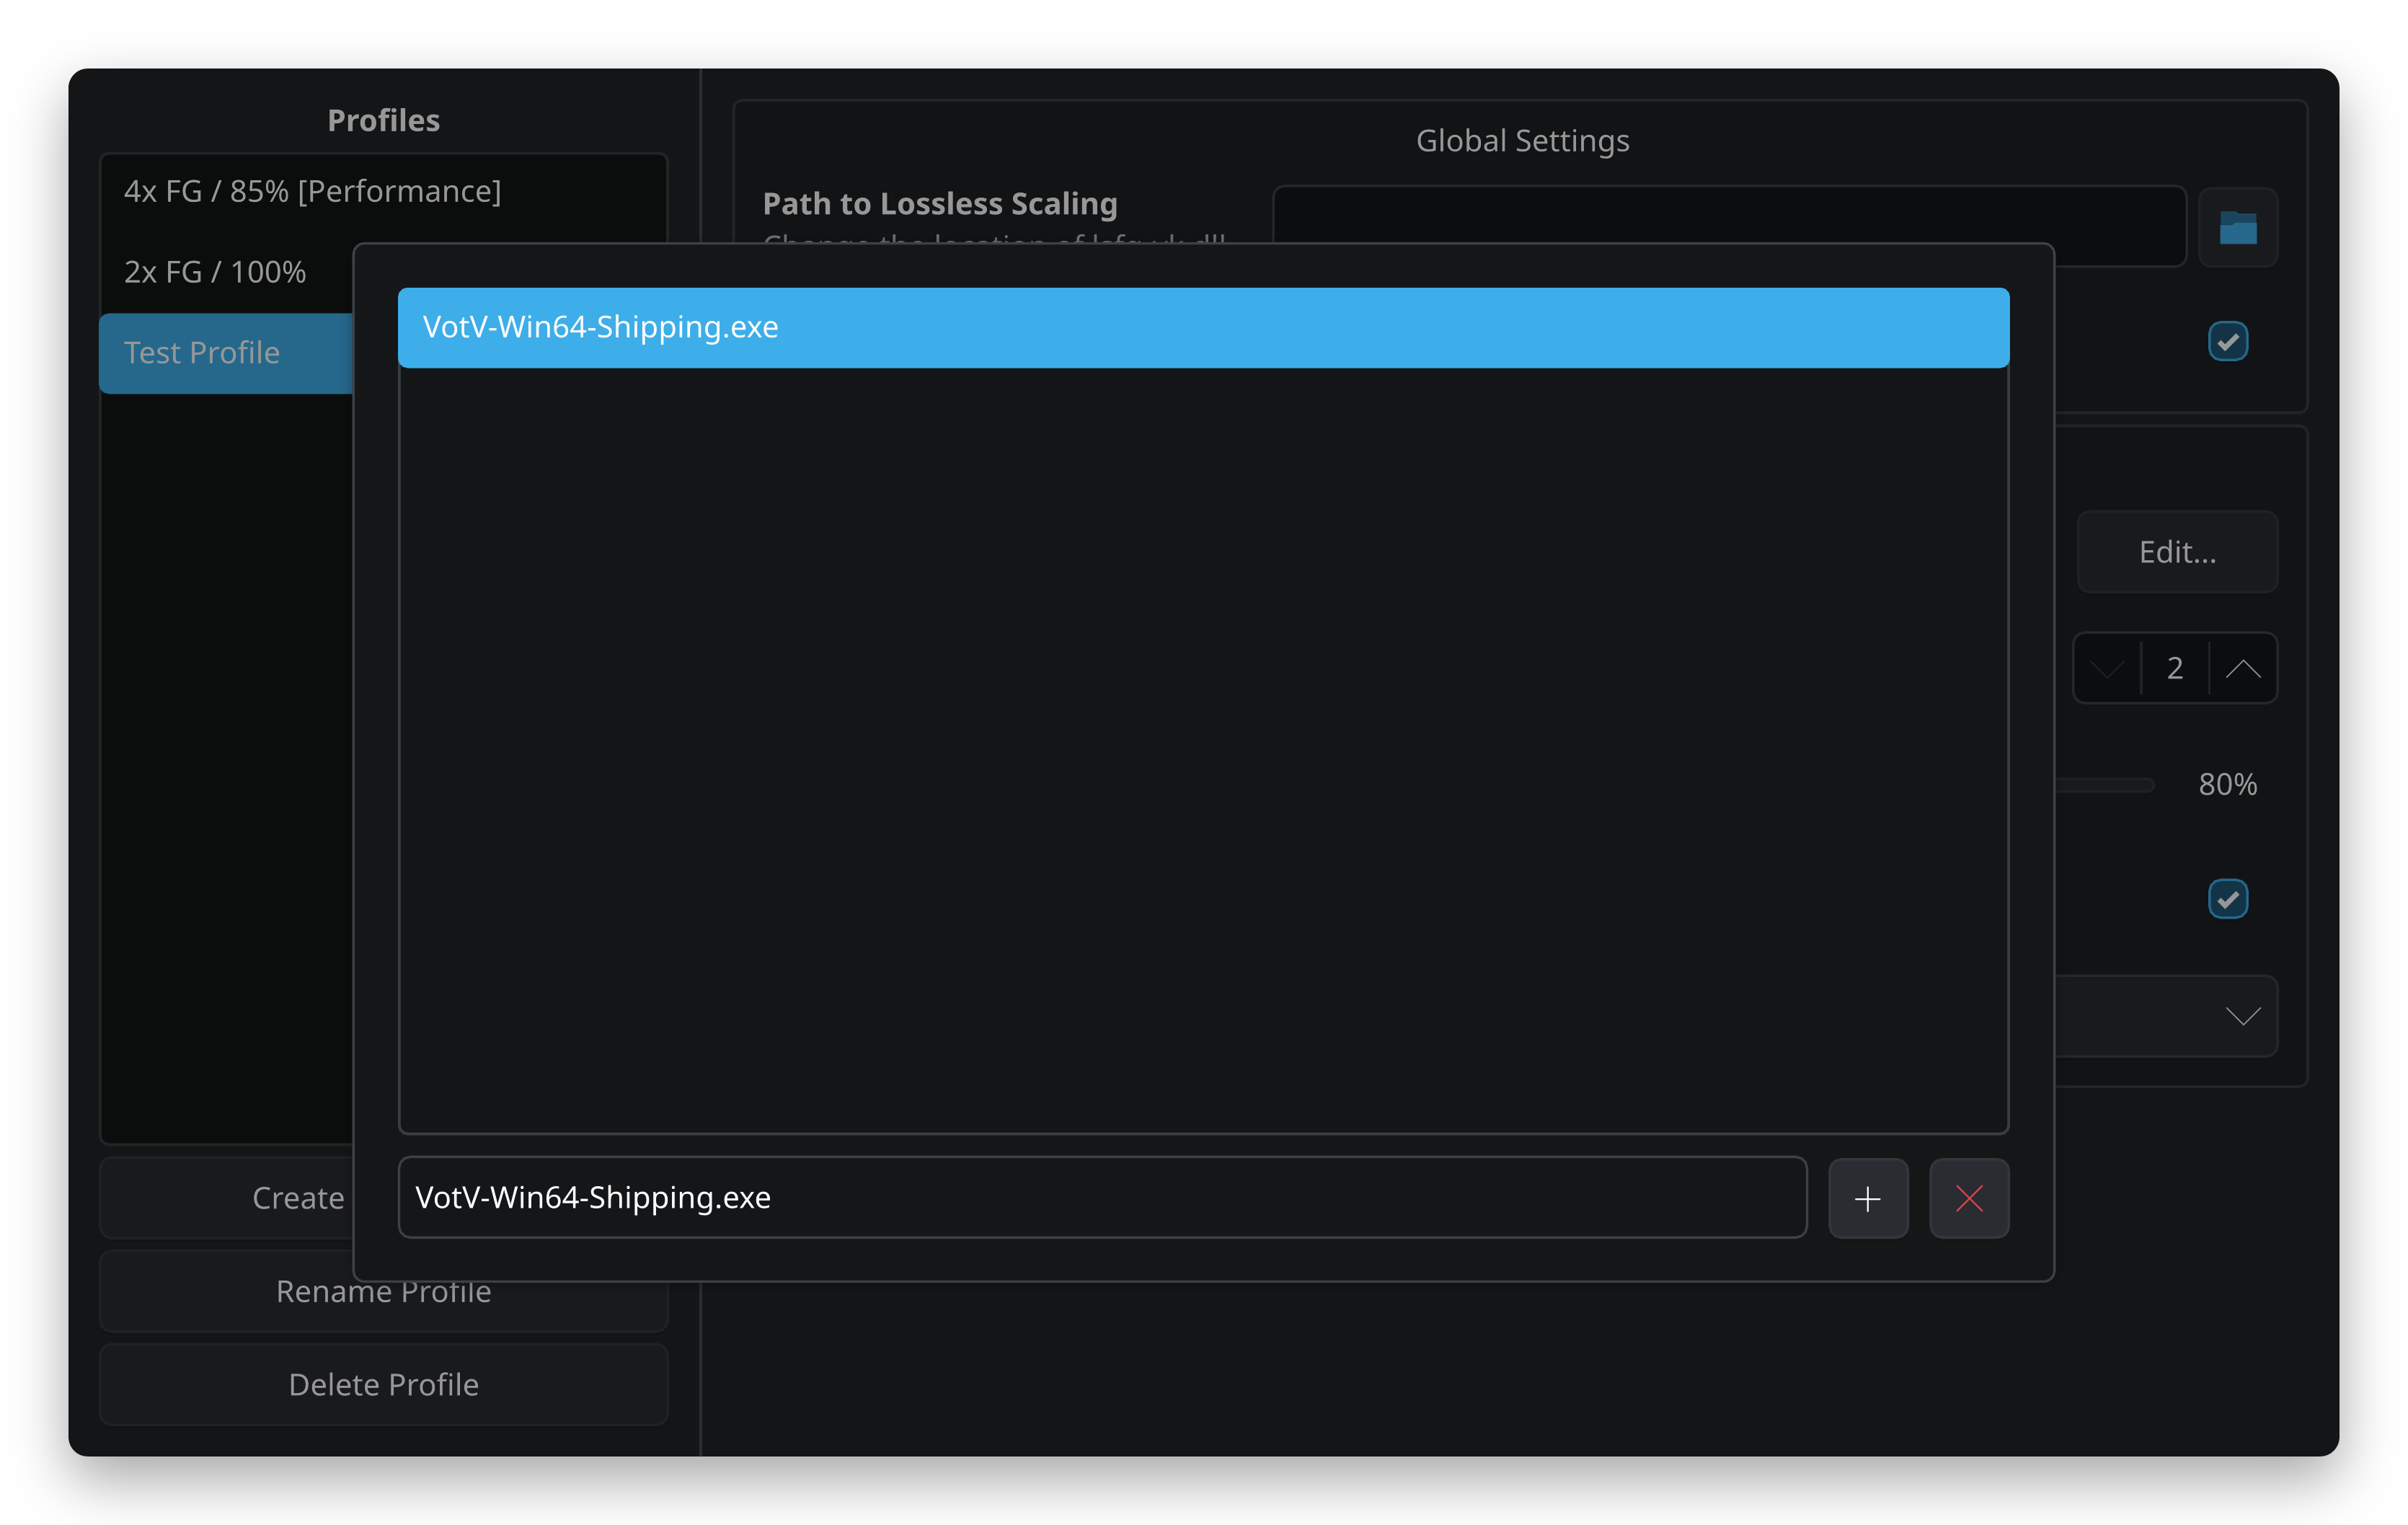
And that’s it! After restarting the game, lsfg-vk should automatically detect it and apply the profile.